 For anyone who is carving an outdoor painted sign, your best raw material is usually high-density urethane (HDU) sign board.
Unlike wood, you do not need to be mindful of the grain direction when carving. For that reason, HDU is much easier to fabricate than wood. What’s more, because this closed-cell synthetic material does not absorb water, it will not rot, decay, warp, or splinter.
Working with HDU is relatively easy, however you still need to follow a few simple rules. I will explore three topics to help ensure your success—the selection of HDU sign board, shaping it, and painting and priming it.
Selecting HDU
Use the highest quality materials that your customer is willing to pay for. Remember: There are no shortcuts to quality and value.
High-density urethane is available in a variety of densities. By varying the chemical formulation, the manufacturer can control the degree to which the mixture foams and, consequently, the density of the sheet. Density is the weight of the HDU per cubic foot, and there are various densities.
The most common density used in the sign industry is fifteen-pound. This heavier material is harder and stronger, which allows you to carve more intricate detail. The eighteen-pound material is also smoother, so it takes fewer coats of primer to achieve a desirable finish.
For larger sign projects subjected to significant wind loads, many sign makers select thirty-pound material. Just be aware that the denser HDU costs significantly more. What can I say? You get what you pay for.
While signs made from HDU have a number of advantages over redwood and cedar, one disadvantage is that it has neither the density nor structural strength of wood. As a comparison, redwood density is about twenty-seven-pound per cubic foot, which is nearly twice that of fifteen-pound HDU.
Whereas wood is comprised of long, sinewy fibers, HDU is made up of very tiny cells (bubbles) that are formed in the chemical foaming process. These little bubbles don’t provide a lot of structural strength.
Whichever density you settle upon, thoroughly read the manufacturer’s instructions beforehand. Do not assume that the rules that apply to working with one product, such as an epoxy adhesive or primer from one manufacturer, are the same as those for a similar product.
Shaping HDU
In cutting and shaping HDU, you can use many of the same types of power tools and hand tools that you would use when working with wood: circular saws, band saws, table saws, jig saws, angle grinders, and routers.
When using an angle grinder, be sure to wear your safety equipment—including a tight-fitting respirator with a particulate filter and either a face shield or safety glasses. You should also use earplugs, especially during prolonged use of any power equipment.
Once you have the basic forms cut, you can use standard wood carving tools, such as chisels, gouges, knives, rasps, and files. Because the HDU has neither grain nor knots, it will cut easier than real wood.
After carving HDU with chisels, knives, or rasps, you can use a variety of sandpaper grits—ranging from coarse to fine-grit—to smooth out any rough edges.
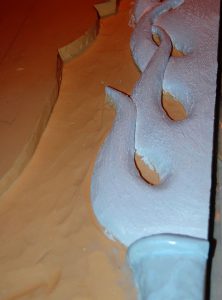
I’ve even been using Precision Board TSF-45 Texture Surface Finish to create textured surfaces (such as wood and stucco) and strengthen the HDU. This water-based material comes pre-mixed in a can, ready-to use. When the coating dries, it provides a tough yet flexible surface.
(Note: Not only can you use TSF-45 on HDU, but it also works on other surfaces—such as glass, concrete and even metal.)
Before applying any coating to your carving, make sure that you clean off any surface debris with a chip brush or blow off any dust with your shop’s air hose.
Application of the TSF-45 is a two-step process. First you need to coat the surface with the pre-mixed texturing paste so that it completely wets out on the surface. This step is critical to prevent any delamination of the coating from the HDU.
To scrub the mixture into the surface, you can use different sizes of chip brushes that have been trimmed, leaving about 1/2-inch of the brush hairs.
In a sense, this first application is a primer coat. Then apply a second, smooth coating, which you can do before the first coating dries.
If you follow the manufacturer’s instructions, the TSF-45 coating will bond to the surface with no need for a primer. You can use a comb, notched trowel, stick, or even your fingers to create the desired textures.
The applied coating is usually dried within twelve hours, but that drying time can vary, depending on your shop temperature, humidity, and the thickness of the coating. Be sure that the textured coating is completely dry before priming and painting.
You can paint TSF-45 with a variety of water-based paints. “Lettering enamels are stiffer than the TSF-45 and will not expand and contract at the same rate,” explains Kellie Miller, marketing manager at Coastal Enterprises. “What usually results is that the enamel cracks.”
Painting HDU
If you fabricate and install an HDU sign according to manufacturer’s instructions, it should last between ten and thirty years. One of the keys to creating a durable sign is primers and paints that are compatible with the sign board.
Because HDU is impervious to chemicals, you can use any type of paint to decorate it including enamels, urethanes, and lacquers. Before painting, however, the surface must be primed.
Painting without priming produces a very dull finish, which for most signage projects is unacceptable. Many of the primers that sign makers use for HDU have very high solids content, which coats the board with a thick layer of primer, smoothing the rough texture of the HDU material.
It is important to remember that not all primers are the same however.
A standard primer only contains about 35 percent solids.
I use FSC-88 WB, which is comprised of 80 percent solids. It fills in the rough HDU texture in one coat—though I always apply two coats—smoothing the surface and preparing it for the finish coatings. While you can brush FSC-88, you can also coat the surface with a roller, or you can thin it out and spray it.
Before priming HDU, you should sand the surface to remove any machining marks. After sanding, clean any residual dust from the surface using a brush, compressed air, or a tack rag.
Applying the primer with a chip brush usually works best, because it is stiff enough to scrub the coating into the texture of the HDU.
When you apply the primer, don’t lay it on too thick. A thick coat will take longer to dry and can trap moisture that could lead to problems later. It is better to apply two thinner coats of primer, rather than one thick coat.
Once the primer is applied, direct a high-volume fan over the coated surface to aid the drying. “Drying under a shop fan is essential,” recommends Miller. “The primer dries faster, and the flow of air prevents the coating from absorbing ambient moisture.
“If the primer doesn’t dry properly, you run the risk that it will delaminate from the HDU.”
After the first coat is thoroughly dry, apply a second coat. Do not sand between coats, so you can build up sufficient mil thickness.
After the second coat is dry, then you can sand using 220-grit sandpaper. If the primer starts to ball up as you are sanding, allow additional time for drying.
After sanding, place your sign under a shop fan again for an hour. This last step will prevent the primer from reabsorbing moisture from the air.
The primed surface can be painted with either enamel or latex paint. Be sure to dry-sand between each coat, using 220-grit wet and dry sandpaper. Sanding will smooth the surface, removing any imperfections and promoting good inter-coat adhesion.
By Jim Hingst


