 One key to the increased usage of LED lighting in interior channel letter projects has been the ability to select a color from a wider available palette than the traditional shades of red. Therefore the process of mocking up a test bed channel letter using several different LED colors is actually an easy task that any sign shop can do—and at minimal cost.
By switching between colors, a test bed channel letter will allow a client to see real-world color variations. This side-by-side view can also help a sign shop confirm their design or production needs, i.e., comparing one brand of LEDs to another, deciding between strips versus modules, etc.
For example, if you’re finding that a channel letter color is hard to match with the stock acrylic and LED colors available, you can try achieving a combination effect. Traditionally this has equated to a white translucent acrylic face backed by a translucent color film.
But in the updated scenario, you can print white vinyl with a range of color (darker than to lighter than the desired reference chip) and apply it front-lit style to the inside of a sample channel letter. You can then review the color results with the selected LED lighting and go on to match cool colors with the bright-white LED lamps and warm colors with the off-white/yellow-white diodes.
Colors: In the Mix
Purely from an illumination standpoint, a strip of white LEDs alongside a strip or two of blue LEDs diffused on a white sign face offers a softer shade of blue. However to test the relationship of one color with another, you can vary the voltage. Many LEDs used in channel letters and signage can be dimmed, although some of them require that the voltage change on the secondary connection.
One option here may be to connect a variable power supply or a combination of stock commercial low-voltage dimmer to a traditional magnetic power supply and dim one set of LEDs. In most cases, a user will dim the white LEDs instead of the colored ones. (Note: Red may be the exception).

When a good balance is achieved, note the relationship. If a strip of LEDs is dimmed 50 percent, then install half as many LEDs or use strips with a reduced LED-per-inch count.
An easy way to achieve color variation may be to just install RGB LEDs in the first place and connect them to a color controller. This will allow the selection of a wide variety of colors by dimming one (or more) of the three channels. There are even some LED light strips that can have an RGB color pre-programmed so there will be a set color combination.
Then again, the ability to change LED colors at a single location after the installation may be an added feature. However t
o keep the word “tacky” from being mentioned during your design review, be sure to set the color change to a slow, smooth pace.
Another factor that might make the color mix process easier is the ability to see the power rating for a strip of LED light. These strips are often rated in watts per foot, and their power consumption usually equates to the relative light output within a product line. This ranges from the low-end (1 Watt per foot) to the high-end (10 Watts or more per foot). The ability to run the power through the strip becomes the limiting factor here.
Diodes: on the Return
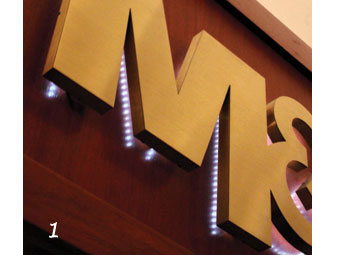
It is key to think of LED as a distinctly different kind of lighting than neon or fluorescent. After all, there are many examples of LED modules being used in standard channel letters that just don’t look that good (Photo 1). Looking at this example, you can see that neon would’ve been the better illumination choice here. But do you know why?
The continuous 360-degree nature of a neon tube allows the lighting to exit directly (as well as indirectly) by retro-reflecting from internal surfaces in a channel letter or sign. On the other hand, LED lighting tends to be point source illumination, often in modules and with few, yet very bright diodes. For face-lit or retrofit applications, LED should do the trick when a sufficient amount of lights are used.
Compared to neon, there’s another variable in selecting what LED lights will work and where— traditional channel letters. These types of cans are deep and white inside with translucent acrylic faces that diffuse the light nicely.

With a newly constructed set of letters, an alternate location for the internal LED lights is along the return (Photo 2). Two schools of thought might arise here. One has the diodes aligned on the harness or strip to apply to the letter return, i.e., the back for reverse-lit channel letters. If so, there’s no need for a white interior, a deep return, etc.
Another possible method is placing the LED diodes so that they face the internal parts of the letter because that’s how they are attached to the strip (Photo 3). The resulting illumination is indirect based on the traditional, white, reflective interior.
Both of these methods may require a strip around the entire perimeter. Stroke width will be a determining factor (where “wide” equals the need for more diodes).
However there’s one trick that never appears to fail: Don’t skimp on the number of LED lights you use.
By Peter Perszyk


