What do LED signs, UFOs, and the Loch Ness monster all have in common? All three are notoriously difficult—and some might say impossible—to photograph.
While LED signs may not be impossible to photograph, there are certainly enough bad sign photos to know it can be a challenge. And it’s an important step to get right. Bad sign photos just don’t do justice to the beautiful images LED signs can display.
In the worst cases, these photographs show blurry, distorted and washed out images, even when the LED sign looks great in person. By understanding a few concepts and making adjustments to your camera’s settings, your LED sign photographs can improve significantly.
The first thing to try is setting the camera to Shutter Priority Mode, commonly denoted as “Tv” or “S” on the camera’s dial. This will automatically compensate the ISO and aperture to get a good exposure. That way you only have to adjust one setting.
If Shutter Priority Mode doesn’t get the results you want, the next step is to try full Manual Mode. Just turn the dial a few more clicks to the “M” position. Don’t worry. This isn’t as scary as it seems.
Take some time to familiarize yourself with your camera with these helpful hints:
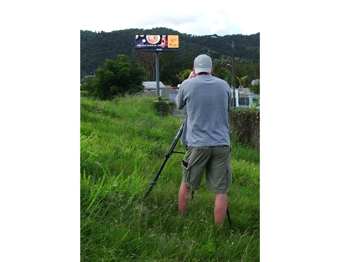
1. Slower shutter speed. The most critical step is to lower your shutter speed to 1/15s, 1/30s, 1/60s, or possibly 1/125s. Keep in mind that the lower the shutter speed, the steadier the camera will need to be to prevent blurry images. The general rule is that if you’re shooting any photo with a shutter speed below 1/60s you should use a tripod or prop the camera on a steady surface like a wall or the roof of your car.
Why does the shutter speed matter? LED signs, much like older TV screens or computer monitors, often show bars or lines in photos because the image is constantly refreshing. Slowing down the shutter speed helps mimic the sign’s refresh rate and fixes the problem by giving the modules time to get in sync.
2. Lower the ISO. Once you’ve changed the shutter speed, you may also need to change the ISO, which adjusts your camera’s sensitivity to light. Allowing the shutter to stay open longer lets more light into the camera so you’ll often get blown out photos, especially on bright sunny days.
One way to prevent this is to set your camera’s ISO setting as low as it will go, typically 100. You can increase the ISO when not in direct sunlight but rarely should you go above 400 when shooting outdoors. Low ISO levels will also produce the cleanest images with minimal digital noise. If using Shutter Priority Mode, this should be adjusted for you automatically.
3. Adjust the f-stop. Similar to shutter speed, your camera’s aperture setting (or f-stop) controls how much light can reach the image sensor inside the camera. When you’re using a lower shutter speed, you’ll likely need to increase the f-stop to prevent washed out, overexposed photos. I recommend using the highest f-stop number available on your camera (typically f/16 to f/22).
The higher the f-stop number, also known as a narrow or small aperture, the less light allowed in. This compensates for the slow shutter speed we’re using, which lets a lot of light in, and makes for a better overall exposure. This should also be adjusted for you automatically if using Shutter Priority Mode.
While using the appropriate settings will make a big difference, you’ll still want to pay attention to the ambient light and the environment. Here are a few adjustment tips to consider:
* Try to avoid taking photos of LED signs in bright sunlight. On most consumer cameras, it’s difficult to get the settings dialed in correctly with that amount of ambient light.
* Take photos of the shaded side of the sign to get a better exposure.
* Compose your photos so that you can see the whole sign structure, not just the LED sign.
* Take a few photos from slightly different angles to show the cabinet depth and construction.
* Take photos of the various artwork displayed on the sign. Try to capture the most colorful or impactful images.
* Pay attention to clutter in the background like cars, power lines and other buildings. Take a moment to walk around the structure and look for angles that eliminate, or at least diminish, these background distractions.
Happy shooting!
—Watchfire Signs http://www.watchfiresigns.com


